What is it
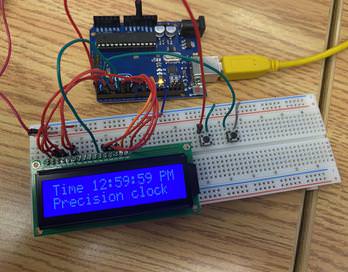
An Arduino digital clock is a project that uses Arduino UNO Board, some jumper cables and a Crystal LED screen display.
How it works
The Arduino digital clock uses the Crystal LED screen display to display an initial time of 1 AM. The time is adjustable by using one of two buttons: One that controls the hour and one that controls the minutes.
How it's Made
To create an Arduino digital clock:
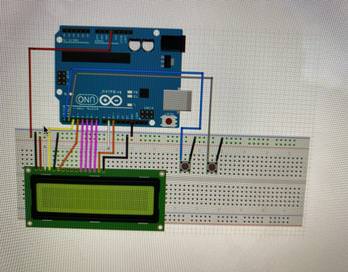
- Get an Arduino UNO Board, jumper cables and a Crystal LED screen display
- Connect the cables to the Arduino following the provided wiring diagram.
- Write a program in Arduino IDE to display the initial time of 1:00 pm and creating loops in the program to contain the numbers to their respective values. When Hour is above 12 then reset to 1 When minutes is above 59 then reset to 0
- Upload the code to the Arduino board.
- Test the clock and configure screen contrast as needed
Our Experience
For our final Arduino project, me and Jasper decided to make a digital clock. We serached up project ideas and the digital clock caught our attention so we decided to try and create a clock withthe arduino equiment we had. To start, we tried recreating the picture on top for the assembly. When we put it together, we coded it and it did not work how it was supposed to, it would light up but there would be no numbers or letters. After a while we realized that a cable was missplaced and it was the problem. When we fixed the cable the clock worked and we had two buttons to adjust the hours and the minutes.It was a very nice experience overall and I am looking forward to work with more projects like this one.